
Renovation · remodel · DIY · trades
One doorway. Six months. One before and after.
Every renovation produces hundreds of photos and almost no usable before and after, because nobody stood in the same place twice. The fix costs nothing: pick the doorway on day one.
- Shoot
- Every working session
- Projects
- 4
- Photos stay
- On your device
Cadence
Every working session, and here is why.
Rooms change in visible steps rather than gradually, so shooting per session captures each step. The photos also double as a record of what was behind the wall before it was closed up.
The setup
Decide this once. Then stop deciding.
Every one of these is a decision you make a single time. The whole point is that the next photo needs no thought at all.
Stand in the doorway, always
A doorway is the one spot in a room you can find again with your eyes closed, and it usually frames the whole space. Mark the exact spot on the floor with tape under the threshold.
Keep the camera level
Tilting up or down turns straight walls into converging ones, and the amount of convergence changes between photos. Level camera, room centred.
One project per room, one per detail
A wide project for the room and separate ones for anything you will want to show closely: the run of cabinets, the fireplace, the wall you opened up.
Shoot before the skip arrives
The genuinely bad state, the one nobody photographs because it is embarrassing, is the shot that makes the finished room look like an achievement.
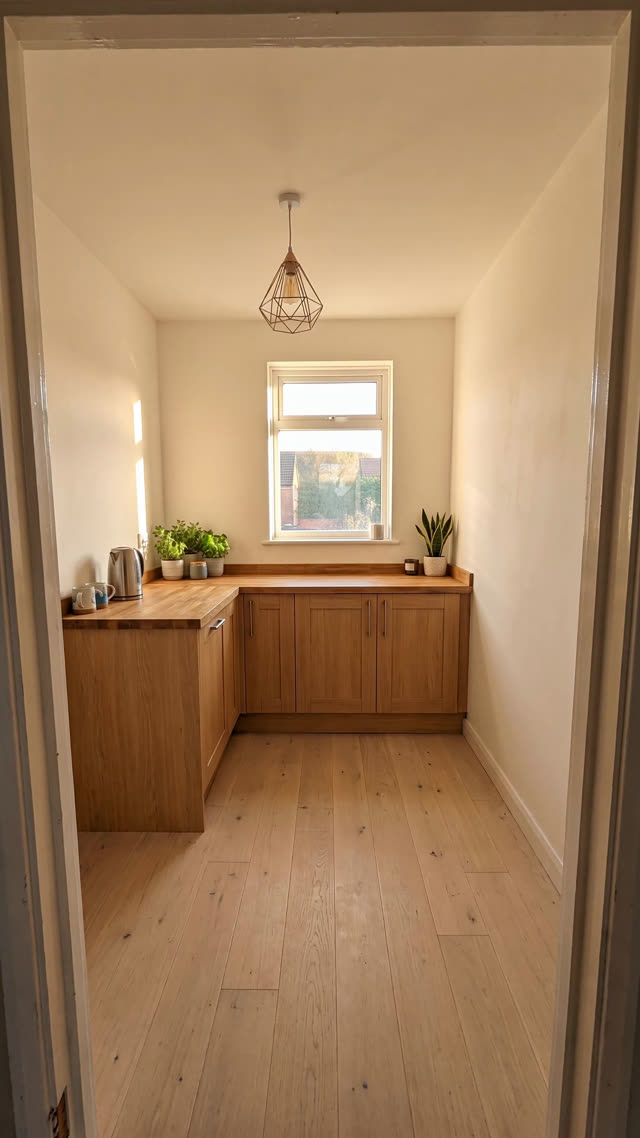
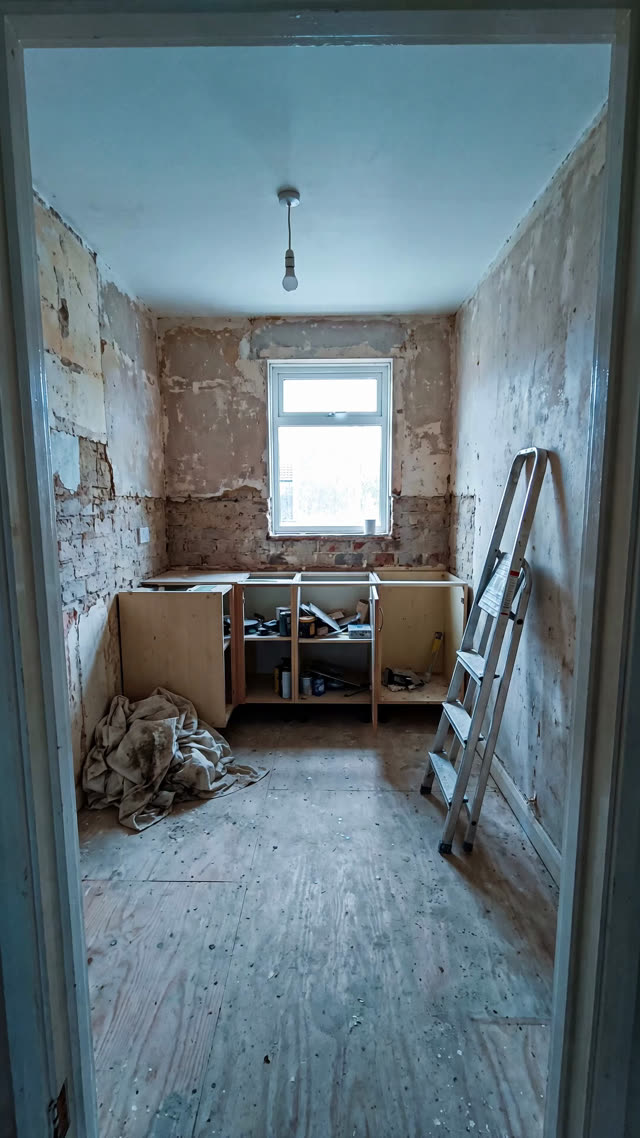
The payoff
Two photos that agree on everything except the subject.
Drag it. The wall, the floor, the light and the lens are identical, so the only thing your eye can read is the change. That is the entire trick, and it is decided at capture time, not in an editor afterwards.
Try it with your own photosWhat goes wrong
The mistakes that quietly ruin the set.
- Photographing the finished room from a flattering angle that does not exist in any of the before shots.
- Waiting until demolition is done to take the first photo.
- Shooting at night under work lights on one day and in daylight on another.
Questions
Renovation photos, answered.
How do I take renovation before and after photos?
Pick one spot, almost always a doorway, mark it on the floor, and take every photo from there with the camera level. Line each new photo up against the previous one so the framing never drifts, and shoot at the same time of day so the light matches.
Can I use this for client updates?
Yes. Aligned photos export as a side by side or a swipe-reveal comparison and as a vertical time-lapse, which is usually more convincing in a client update than a folder of loose photos.
Also tracked with SameShot
Same camera, different subject.
Guides & Tools
Related guides and tools for renovation progress.
Take the first one today.
The starting photo is the only one you can never go back and take. Free on Google Play, no account needed.

SameShot: Progress Photos
Appynox · Lifestyle
Before and after photos that line up. Ghost overlay camera, AI auto capture.
- Price
- Free
- Rated
- Everyone
- Account
- Not required
- iOS
- In development
Free, no account, nothing uploaded. Android 8.0 and above.